
The bottom line
An ultrasonic thickness gauge measures “the time of the echo”, and no echo means no reading. Every coupling action serves one purpose: send the sound into the part effectively, and bring the echo back effectively.
Choosing the couplant
| Condition | Recommended type | Note |
|---|---|---|
| Room temp, horizontal, part facing up | Water- or oil-based couplant, glycerin | Good flow, easy to clean |
| Vertical and overhead surfaces | High-viscosity couplant | Prevents running off, keeps contact steady |
| Hot workpiece | High-temperature couplant | Room-temp couplant fails or even vaporises |
| Rough surface | High-viscosity couplant | Fills micro peaks/valleys, improves acoustic contact |
| Surface that must stay clean | Choose per process; dry coupling or low-frequency probe if needed | Confirm the permitted medium first |
Probe technique
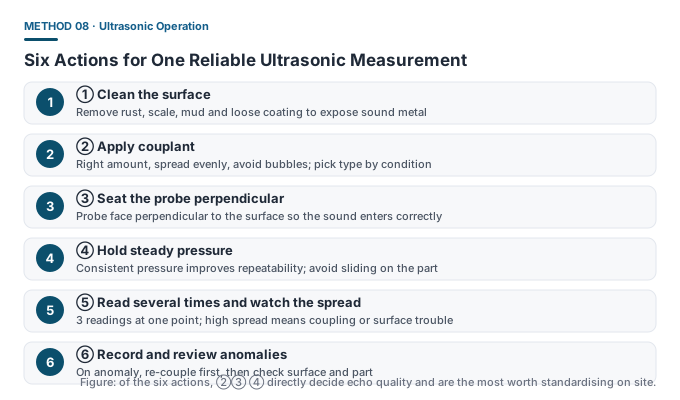
- Clean: before measuring, remove rust, scale, mud and loose coating — these scatter the sound;
- Apply: put couplant on the spot, spread it evenly, avoid trapping bubbles;
- Seat: keep the probe face perpendicular to the surface and flat overall, do not press only one side;
- Pressure: keep steady, consistent force. Too little gives poor coupling; too much may thin the couplant layer and shift the reading;
- Hold still: keep the probe still while reading; avoid sliding on the surface;
- Verify: take 3 readings at one point and watch the spread. A large spread means a coupling or surface problem.
Troubleshooting order when readings misbehave
When the reading jumps, reads low or fails to appear, work through this order — the order matters because it follows probability:
- Coupling: re-apply couplant, clean the probe face, adjust pressure. This is the most common cause;
- Surface: rust, scale, excessive roughness, uneven surface;
- Workpiece: internal scaling, corrosion pitting, internal defects that scatter the echo;
- Settings: wrong sound speed, unsuitable measuring range;
- Instrument: worn probe, loose cable contact, low battery.
Handling different surfaces
- Scale and rust: clean with sandpaper or a wire brush down to bright metal, but do not grind the part itself thin;
- Paint and coating: remove if grinding is allowed; if not, switch to through-coat mode;
- Hot surface: use a high-temperature probe and couplant, and respect the probe temperature limit;
- Curved surface: use a small-diameter probe, increase contact pressure and keep it perpendicular.
Common misconceptions
- ❌ “A jumping reading means the gauge is broken” — in the vast majority of cases it is coupling; re-applying usually restores it at once.
- ❌ “Any couplant will do” — viscosity and temperature rating differ; the wrong one on an overhead or hot job fails outright.
- ❌ “More pressure is always better” — too much pressure makes the couplant layer too thin or squeezes it out, lowering coupling quality.