
The bottom line
The three operations answer three different questions: calibration asks “is this gauge accurate”, verification asks “is it still accurate now”, and adjustment asks “how do I compensate when I move to this workpiece”.
Step 1: Calibration
| Factor | Detail |
|---|---|
| Performed by | Equipment manufacturer, its authorized agent, or an accredited calibration laboratory |
| Frequency | One-time factory calibration, then recalibrated on a cycle |
| Tools | Reference material traceable to a national metrology institute |
| Output | Calibration certificate (Long Form recommended, with measurement uncertainty) |
| Purpose | Establishes the gauge value state; part of the traceability chain |
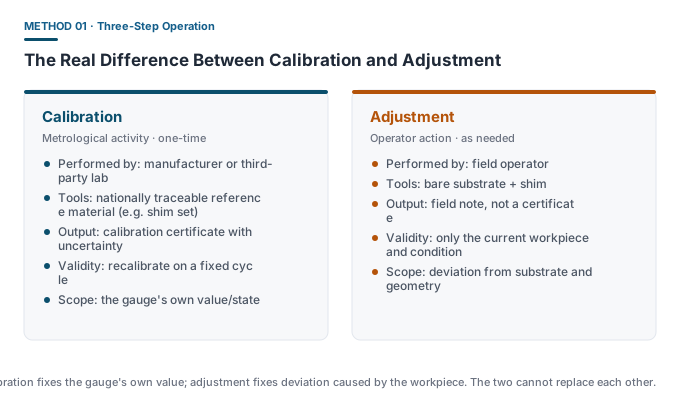
Calibration is a metrological activity that the field operator cannot perform. Its result lives on the certificate, not in that day’s readings.
Step 2: Verification
Verification is the operator’s responsibility, at the start and end of every shift, and after the gauge is dropped, gives suspicious readings, or experiences a large environmental change.
- Place a shim of known thickness on the bare substrate;
- Measure the shim; the difference between the reading and the nominal value must fall within tolerance;
- Record the verification result, including the shim nominal value, the reading, the date and the operator;
- Verification fails → go to the next step, Adjustment.
Step 3: Adjustment
Adjustment compensates for deviation caused by workpiece-specific conditions — mainly substrate material, surface roughness and geometry. The standard practice has two levels:
- Zero adjustment: measure on the bare substrate (or an uncoated surface of the same roughness) and zero the reading. This removes the effect of the substrate and roughness;
- Slope adjustment: place a shim on the zero-adjusted substrate, measure, and correct to the shim nominal value. A one-point correction adjusts the slope; a two-point correction adjusts both zero and slope.
Quick comparison
| Calibration | Verification | Adjustment | |
|---|---|---|---|
| Performed by | Manufacturer / lab | Operator | Operator |
| Frequency | One-time + cycle | Every shift | On failed verification or condition change |
| Tools | National reference | Shim | Bare substrate + shim |
| Output | Calibration cert. | Shift record | Field note |
| Scope | Gauge value | Status check | Current workpiece & condition |
Four practical points
- Before adjusting, confirm the substrate state matches the workpiece — different steel grades and different roughness each need their own adjustment;
- The shim thickness should be close to the thickness you normally measure, not picked at random;
- Record every adjustment result, and state the shim number and nominal value used in the report;
- Adjustment cannot replace calibration — after each required interval or any impact, the gauge must still be sent for calibration.
Common misconceptions
- ❌ “I zeroed it on site, so it is calibrated” — an on-site adjustment is valid only for the current workpiece and does not change the gauge metrological state.
- ❌ “Verification failed, so just recalibrate” — first adjust on site and re-verify; only if it still fails should you send it for repair or calibration.
- ❌ “Verifying every shift is too much trouble” — this is an explicit standard requirement and the basis for an auditable report.