
The bottom line
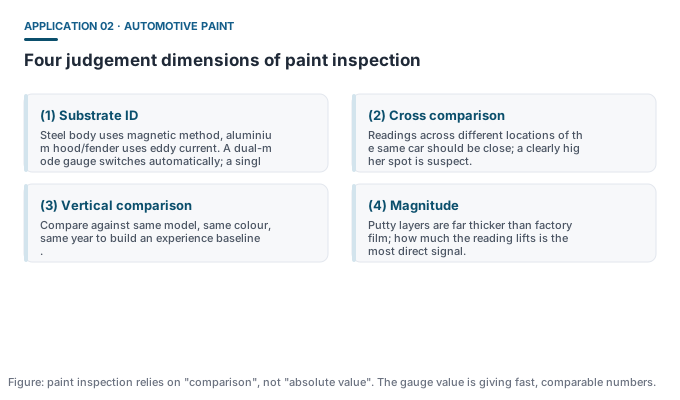
Paint inspection does not measure “how thick the paint is” — it measures “which parts of this car differ from others”. The gauge gives numbers; the judgement comes from horizontal and vertical comparison.
Step 1: confirm the substrate, pick the principle
Passenger cars of the last two decades use many aluminium panels (hood, fenders, trunk lid) mixed with the steel body. That imposes a hard requirement on the gauge:
- Steel parts (ferromagnetic) -> magnetic method;
- Aluminium parts (non-magnetic, conductive) -> eddy current method;
- A single-principle gauge fails outright on aluminium, so body inspection must use an Fe/NFe dual-mode gauge.
Dongru dual-mode models include DR-A5 (0-2000 μm, auto-identifies ferrous/non-ferrous, inspection-special version), DR130 (0-1500 μm, automotive), DR230 (0-2000 μm) and DR330 (0-2000 μm).
Step 2: fix the measuring points
Fixed measuring locations are the prerequisite for comparable data. Cover these locations, three readings each:
- Roof (least damaged, often the car baseline location);
- Hood (front and both sides);
- Left and right front fenders;
- Four doors (upper edge and lower section);
- Trunk lid / tailgate;
- A/B/C pillars and sills (high-incidence collision-repair zones).
Step 3: how to read these numbers
Factory paint film thickness varies by brand, colour and process, so there is no universal “standard value”. Judgement rests on three empirical rules:
| Phenomenon | Possible cause | Judgement logic |
|---|---|---|
| Marked difference across locations on the same car | Local repaint or body repair | The more a spot deviates from others, the more likely a repair |
| Single reading far above other spots on the same car | Filler (polyester putty) applied | Putty layer thickness is usually several hundred micrometres or more |
| Whole-car readings uniformly high | Full repaint | Confirm against same-model baseline |
| Readings in expected range and evenly distributed | Factory condition | Record as this car baseline value |
Operating points
- Clean the paint before measuring, remove wax, grit and water stains;
- Avoid seams, trim, edges, decals and plastic parts;
- Hold the probe perpendicular to the surface with consistent pressure;
- Take 3 readings per location and average, to reduce random scatter;
- Record ambient temperature — extreme temperatures affect both film and gauge.
Common misconceptions
- “Lower reading means thinner paint, so more original” — factory film varies a lot by brand; a low reading can equally be a thin repaint.
- “A magnetic gauge reading nothing on an aluminium lid means it is broken” — the principle does not apply; use a dual-mode gauge instead.
- “A thickness gauge replaces a paint colour-difference meter” — they complement: thickness reflects structural repair, colour difference reflects batch and formulation.